Whiteboard Editing Tools

Learn how to edit existing content on your iDroo whiteboard with various tools and options. This guide covers object selection, moving, scaling, styling, text editing, and using the context menu for efficient modifications.

All changes made to the whiteboard are immediately visible to other participants in real time, making collaboration seamless.

Selecting objects

First, make sure you have the Pointer tool active. Select it from the toolbar or press P.

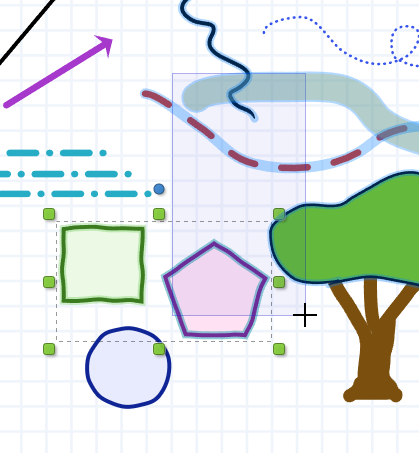
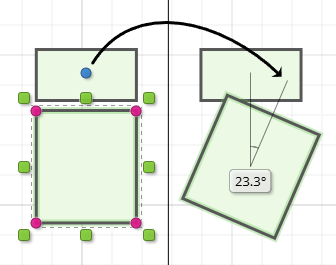
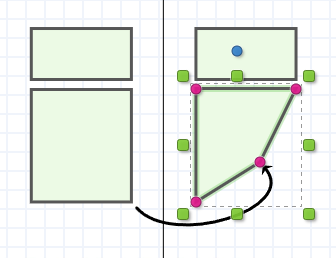
Click on an object to select it. Alternatively, click and drag a selection box around multiple objects to select them together.

Hold Shift while selecting objects to add them to the selection. This works for both clicking and the selection box method.

Hold Alt to remove undesired objects from the selection.

The objects that will become selected are shown with a highlight around them before you commit the selection.

To release selected objects, click anywhere on the board background, or press the Esc key.

To select locked objects, hold down the Ctrl key.

To select all objects on the whiteboard, press Ctrl + A.

Selecting multiple objects on the iDroo whiteboard

Move & scale

To move an object, click and drag it to the desired location. You can move multiple objects by selecting them first, then dragging.

You can also move objects with the arrow keys. Normally, objects are moved by one pixel. Holding down Shift moves by 10 pixels, and holding Ctrl + Shift moves by 100 pixels.

To scale, click and drag one of the green handles on the object's corners. Hold Shift while dragging to maintain the object's aspect ratio.

Scaling an object on the whiteboard

Move object point

On some objects, such as shapes, there are individual points that you can manipulate. These points show up as pink circles when the object is selected (only one object must be selected).

You can move these points around by dragging the pink handles to change the shape of the object.

Moving a single object point to change the shape

Styles

With an object selected, adjust its style using the toolbar options. You can change properties like color, line thickness, and fill.

The available styling options vary based on the selected object type, such as shapes, lines, or text.

You can also change styles for multiple objects at once.

Editing text & equations

Double-click a text or equation object to enter edit mode. You can then modify the text or formula as needed. Every change you make is instantly streamed to all the participants.

When you have either the Text or Formula tool active, you can start editing objects of that type by simply clicking on them. The cursor is also inserted right where you click to ease the process.

Click outside the object or press Esc to exit edit mode.

Undo & redo

To undo an action, press Ctrl + Z. To redo, press Ctrl + Y or Ctrl + Shift + Z.

You can also access the undo and redo options from the toolbar next to the logo.

Using the context menu

Right-click on an object or selection to access the context menu, which provides various editing options:

  • Duplicate: Creates a copy of the selected object(s).
  • Delete: Removes the selected object(s) from the whiteboard. Shortcut: Delete
  • Cut: Cut selected object(s) from the board into the clipboard. Shortcut: Ctrl + X
  • Copy: Copy selected objects to the clipboard. Shortcut: Ctrl + C
  • Paste: Paste content from the clipboard to the board, whether it's board content, text, or an image. Shortcut: Ctrl + V
  • Group: Combine multiple objects into a single group to treat them as one object. Shortcut: Ctrl + G
  • Ungroup: Separate grouped objects. Shortcut: Ctrl + U
  • Bring to Front: Bring selected objects in front of all other objects.
  • Send to Back: Send selected objects behind everything else.
  • Lock to Background: Locks the object to the background. Locked objects are rendered behind everything else and can only be selected by either right-clicking or while holding down the Ctrl key. Once selected, they can still be modified like all other objects.
  • Unlock: Unlocks objects previously locked to the background.
Context menu options for editing objects on the whiteboard

Aligning multiple objects

When multiple objects are selected, there are additional alignment options available in the context menu:

  • Horizontal spread: Distributes selected objects evenly along the horizontal axis.
  • Left: Aligns selected objects by their left edges.
  • Center: Aligns objects by their vertical center lines.
  • Right: Aligns objects by their right edges.
  • Vertical spread: Distributes selected objects evenly along the vertical axis.
  • Top: Aligns selected objects by their top edges.
  • Middle: Aligns objects by their horizontal center lines.
  • Bottom: Aligns objects by their bottom edges.
Aligning multiple objects using the context menu

Tips and best practices

Here are some tips to help you work more efficiently on the iDroo whiteboard:

  • Use shortcuts: Familiarize yourself with the keyboard shortcuts mentioned above to speed up your workflow.
  • Group objects frequently: Grouping related objects can make it easier to move and manage them as a single unit.
  • Lock objects to the background: When working with complex layouts, lock objects you don't want to move accidentally.
  • Zoom in and out: Use the mouse wheel or touchpad gestures to zoom in/out and manage detailed editing more effectively.
  • Right-click for quick actions: Use the context menu to access common actions without switching to the toolbar.